Step-by-Step Guide to Waterproofing Your Basement
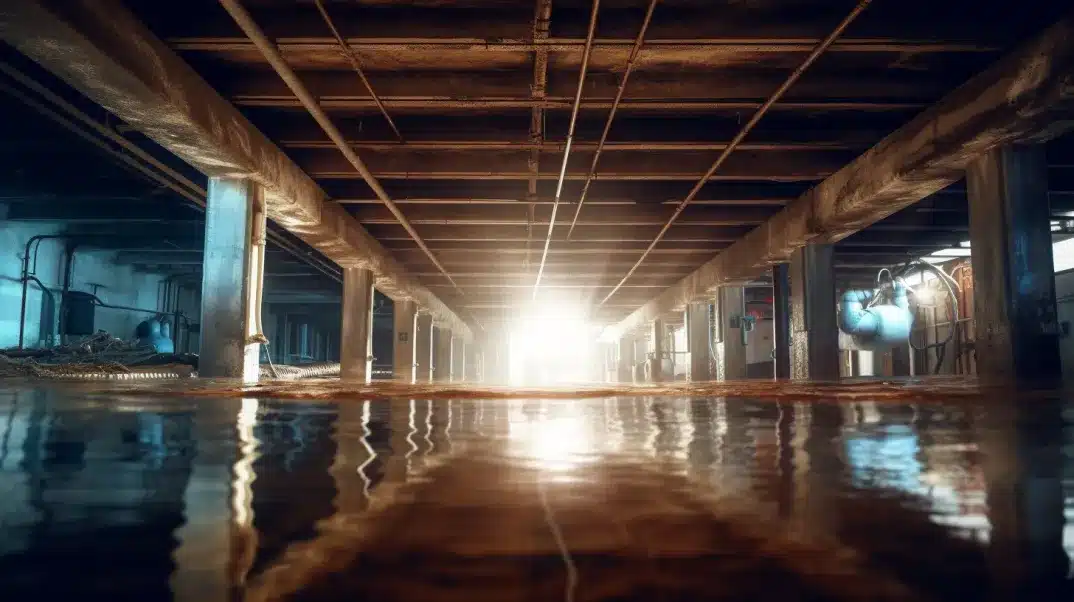
Waterproofing your basement is more than just a preventative measure; it is a crucial component of maintaining the structural integrity and overall health of your home. Basements are inherently prone to moisture problems due to their underground location. Without proper waterproofing, moisture can seep through walls and floors, leading to a host of problems, including mold growth, wood rot, and even foundation damage. These issues can compromise not only the comfort and livability of your home but also its safety and value.
In this blog, we will explore the key reasons why basement waterproofing should be a priority for every homeowner. From protecting your home’s foundation to improving air quality and making the most of your basement space, effective waterproofing offers numerous benefits. By understanding the critical role that this maintenance plays, homeowners can take proactive steps to safeguard their property and enhance their living environment.
Assessing Your Basement’s Waterproofing Needs
Ensuring that your basement is properly waterproofed is crucial for maintaining the integrity of your home’s structure and the health of its inhabitants. Here we’ll guide you through the process of identifying potential moisture problems and conducting a simple test to assess the current state of your basement’s waterproofing.
Identifying Signs of Moisture Problems
Moisture in the basement can manifest in various ways, each indicating potential vulnerabilities in your existing waterproofing system. Recognizing these signs is the first step in addressing moisture issues. Here are some common indicators:
- Water Stains on Walls and Floors: These marks, often brown or dark-colored, indicate that water is seeping into your basement. They typically appear where the wall meets the floor and can also be found on other surfaces.
- Peeling Paint or Wallpaper: Moisture can undermine the adhesive qualities of paint and wallpaper, leading to peeling or bubbling. This not only damages the wall’s finish but also exposes the underlying materials to further moisture intrusion.
- Musty Odors or Visible Mold Growth: A persistent musty smell or visible mold growth in corners or on walls suggests high humidity levels and inadequate waterproofing. Mold can pose health risks and should be addressed immediately.
Conducting a Basic Moisture Test
A simple and effective way to check for excess moisture in your basement is by performing a plastic sheet test. This test helps detect condensation and provides a visual indication of your basement’s humidity levels.
How to Perform a Plastic Sheet Test:
- Prepare the Test Area: Choose a spot on your basement wall that shows signs of moisture trouble. Clean the area so that it’s free of dirt and debris to ensure the plastic sheet adheres properly.
- Attach the Plastic Sheet: Cut a square of clear plastic sheeting approximately 2 feet by 2 feet. Use duct tape to seal all four edges of the sheet to the wall, ensuring there are no gaps where air can enter.
- Wait and Observe: Leave the plastic sheet in place for at least 24 hours. After this period, check for condensation on the inside of the plastic. If you find moisture, this indicates that water is seeping through the wall.
Understanding the Results:
- Condensation Inside the Plastic: This suggests that moisture is evaporating from the wall into your basement, a sign that your current waterproofing is insufficient.
- Dry Plastic, Wet Wall: If the wall side of the plastic is wet, the issue may be condensation from the basement air, indicating high humidity levels within the room itself.
Each result points to different remedial actions, from improving basement ventilation to applying a new waterproofing treatment. Understanding these results will guide you in choosing the most effective solution for keeping your basement dry and healthy.
Preparing Your Basement for Waterproofing
Before you begin waterproofing your basement, proper preparation is crucial to ensure the effectiveness of the waterproofing materials and techniques. Here we will walk you through the necessary steps to clean and clear the area, as well as how to repair any existing damage that could undermine your waterproofing efforts.
Cleaning and Clearing the Area
A clean and clear basement is fundamental for a successful waterproofing process. Here’s how to properly prepare your space:
Removing Stored Items and Debris
- Clear the Space: Begin by removing all stored items, furniture, and other belongings to provide full access to the walls and floor. This step is essential for a thorough inspection and for carrying out the waterproofing work without obstructions.
- Debris Removal: Sweep away all loose debris, dirt, and dust. For more thorough cleaning, consider using a shop vac to remove finer particles that can interfere with the adhesion of waterproofing products.
Cleaning Walls and Floors
- Wash the Surfaces: Use a stiff brush and a solution of water and mild detergent to scrub the walls and floors. This will remove any substances that might prevent waterproofing materials from adhering properly.
- Address Stains and Mildew: For areas with mold or mildew, use a solution of bleach and water to kill any fungi. Ensure the room is well-ventilated during this process to avoid inhaling fumes.
- Rinse and Dry: After cleaning, thoroughly rinse the walls and floors with clean water to remove any residual cleaning products. Allow the surfaces to dry completely before proceeding to the next steps.
Repairing Cracks and Damage
Addressing structural imperfections such as cracks and holes before applying waterproofing materials is critical to prevent future water ingress.
How to Properly Seal Cracks in Concrete
- Identify the Cracks: Walk through the cleaned basement and mark the cracks that need repair. Not all cracks are serious, but all should be sealed to prevent water entry.
- Cleaning the Cracks: Use a wire brush to clean out loose debris from the cracks. For deeper cracks, use a vacuum to ensure all particles are removed.
- Apply the Sealant: For non-structural, hairline cracks, use a masonry sealer or silicone-based caulk that can flex with the wall. For larger cracks, consider using hydraulic cement, which expands as it cures, forming a tight seal.
Materials Needed for Repairs
- Hydraulic Cement: Best for sealing larger, active leaks in concrete. It sets rapidly and blocks water effectively.
- Masonry Sealer: Suitable for smaller cracks and porous masonry surfaces to prevent water absorption.
- Caulking Gun and Caulk: Needed for applying silicone-based sealants, which are ideal for sealing joints and small cracks.
- Safety Gear: Always wear gloves, eye protection, and a dust mask when mixing and applying cement or using chemical sealants.
Choosing the Right Waterproofing Method
Selecting the appropriate waterproofing method for your basement can significantly impact the longevity and efficacy of the protection it offers. From interior solutions that address moisture from inside your home to exterior methods that tackle water at its source, understanding the options available can help you make an informed decision. Here, we explore both interior and exterior waterproofing techniques, as well as combined approaches for comprehensive protection.
Interior Waterproofing Options
Sealants and Coatings: Types and Application Methods
Interior sealants and coatings are an accessible way for homeowners to protect their basements from moisture. These products are applied to the walls and floors to block water entry.
- Types: Waterproofing sealants can be either polyurethane or silicone-based, each suitable for different types of surfaces and extents of moisture issues. Waterproof coatings, often made from epoxy or acrylic, provide a thicker barrier against water.
- Application Methods: The application typically involves cleaning the surface thoroughly, applying a primer if necessary, and then applying the sealant or coating with a roller, brush, or sprayer. Multiple coats may be required, with sufficient drying time between each layer.
Installing Interior Drainage Systems
An interior drainage system can be an effective solution for managing water that enters the basement.
- Components: This system generally includes a perforated drain pipe installed inside the perimeter of the basement floor. The system collects water entering through the walls or floor, then diverts it to a sump pump, which ejects the water away from the house.
- Installation: Installing an interior drainage system typically involves removing a section of the basement floor around the perimeter, laying the drain pipe, covering it with gravel, and then re-cementing the floor. This work often requires professional installation due to its complexity.
Exterior Waterproofing Techniques
The Benefits of Exterior Membrane Installation
Exterior waterproofing involves the application of a waterproof membrane to the outside walls of the basement, providing robust protection against water infiltration.
- Benefits: This method addresses water intrusion at its source, preventing any moisture from reaching the interior surfaces of the basement. It also protects the structural integrity of the foundation walls from degradation due to water exposure.
Necessary Steps for Excavation and Proper Application
- Excavation: The first step involves excavating the soil around the foundation walls to expose the exterior surfaces. This process must be done carefully to avoid damaging the foundation.
- Application: Once exposed, the walls are cleaned and repaired if necessary. A waterproof membrane is then applied to the exterior wall. This might be a liquid tar-based sealant, a bituminous coating, or a rubberized membrane, depending on the specific product being used.
Combining Interior and Exterior Waterproofing
When to Consider a Full-Scale Combined Approach
- Considerations: A combined approach might be necessary in areas with high water tables, frequent heavy rainfall, or for older homes that have chronic water intrusion problems. Combining both methods offers the most comprehensive protection.
Long-Term Benefits of Comprehensive Waterproofing Strategies
- Protection: By using both interior and exterior waterproofing, you can ensure that water does not enter your basement, thus protecting your home’s foundation and interior living spaces from water damage.
- Property Value: Additionally, comprehensive waterproofing can significantly enhance the resale value of your home, making it a wise investment in areas prone to wet conditions.
Step-by-Step Waterproofing Process
Effective waterproofing involves a series of well-defined steps, whether you are applying interior sealants, installing an interior drainage system, or executing exterior waterproofing. Each method requires attention to detail and adherence to specific procedures to ensure optimal performance and durability.
Applying Interior Sealants
Step-by-Step Guide to Applying Waterproof Coatings or Sealants
- Surface Preparation: Begin by cleaning the surface thoroughly. Remove any dirt, grease, or existing paint that may prevent the sealant from adhering properly. Repair any cracks or holes in the walls or floor.
- Priming the Surface: If the product recommends a primer, apply it according to the manufacturer’s instructions. This can enhance the adhesion of the waterproof coating.
- Application of the Sealant: Apply the waterproof sealant or coating using a brush, roller, or sprayer, depending on the product specifications. For best results, apply a uniform coat and make sure all surfaces are completely covered.
- Applying Additional Coats: If necessary, apply subsequent coats, ensuring that the previous layer is dry before proceeding. Check the product’s drying times as these can vary widely.
- Curing: Allow the sealant to cure fully before exposing it to water. Curing times can vary based on temperature and humidity, so refer to the manufacturer’s guidelines.
Tips for Ensuring Uniform Coverage and Curing
- Use tape to mark off areas not to be coated, such as baseboards and adjacent walls.
- Work in small sections to maintain control over the application and ensure thorough coverage.
- Use proper ventilation to aid in drying and curing, especially in enclosed spaces like basements.
Installing an Interior Drainage System
Components of an Interior Drainage System
- Perforated Drain Pipes: Collect and channel water.
- Drainage Channels or Trenches: House the pipes along the perimeter.
- Sump Pit: Collects water before it is pumped out.
- Sump Pump: Evacuates water from the sump pit to the exterior.
Detailed Steps for Installation
- Planning the Layout: Determine the most effective path for the drainage pipes, usually along the inside perimeter of the basement.
- Breaking the Concrete: Remove a strip of concrete floor along the perimeter where the drains will be placed.
- Digging the Trench: Excavate a trench deep enough to install the drain pipe at a slope.
- Installing the Pipes and Drainage Channels: Place the perforated pipes within the trench, ensuring they slope towards the sump pit for effective water movement.
- Setting Up the Sump Pit and Pump: Install the sump pit and pump at the lowest point of the basement floor. Connect the drain pipes to the sump pit.
- Testing the System: Test the installation by pouring water into the drains to ensure it flows correctly to the sump pit and is pumped out.
Executing Exterior Waterproofing
Detailed Steps for Exterior Membrane Installation
- Excavation: Dig around the foundation to expose the exterior walls down to the footing.
- Cleaning and Preparing the Walls: Clean the walls thoroughly and repair any structural damage or cracks.
- Applying the Waterproof Membrane: Install the waterproof membrane over the exterior of the walls. Ensure it is securely attached and sealed.
- Protection Board Installation: Attach a protection board to shield the membrane from damage during backfilling.
Guidelines for Backfilling and Landscaping Post-Waterproofing
- Backfilling: Carefully backfill the excavated soil, using layers and compaction to prevent damage to the new waterproofing.
- Landscaping Considerations: Plan landscaping to direct water away from the foundation, such as grading the soil to slope away from the house and selecting plants that require less water near the foundation.
Maintaining Your Waterproofed Basement
Regular maintenance is crucial for sustaining the effectiveness of basement waterproofing. This not only helps in prolonging the life of the waterproofing materials but also ensures that your basement remains dry and free from moisture-related damage. Below, we provide guidance on conducting maintenance checks and keeping your basement dry.
Regular Maintenance Checks
What to Look for During Routine Inspections
Routine inspections are key in catching issues before they escalate. During these checks, look for:
- Signs of Moisture: Check for any signs of dampness or water stains on the walls and floors. Pay attention to musty odors as they can indicate hidden moisture issues.
- Cracks or Deterioration: Inspect the walls and floors for new cracks or areas where the waterproofing membrane might be peeling or breaking down.
- Efflorescence: White, powdery residue on concrete surfaces is a sign of efflorescence, which occurs when water evaporates from the concrete, leaving salt deposits behind. This can indicate water ingress.
- Mold or Mildew: Look for any growth of mold or mildew, which thrives in moist environments and can pose health risks.
How to Detect and Address Potential Issues Early
- Use a Moisture Meter: This tool can help detect moisture levels in the walls and floor before they become visible. Early detection can prevent major repairs.
- Regularly Clean and Check Drains and Sump Pumps: Ensure that all drains and sump pumps are clear of debris and functioning correctly to avoid water buildup.
- Sealant and Coating Reapplications: Depending on the product’s life expectancy, plan for periodic reapplication of sealants and waterproof coatings to maintain their effectiveness.
Tips for Keeping Your Basement Dry
Recommendations for Dehumidifying
Managing humidity levels is essential in maintaining a dry basement:
- Use a Dehumidifier: A good-quality dehumidifier can help keep humidity levels in check, especially during wet seasons or in naturally damp climates.
- Improve Ventilation: Enhance air circulation by using fans or installing vents. This helps in reducing moisture accumulation.
- Check HVAC Systems: Ensure that your air conditioning and heating systems are properly adjusted to avoid adding extra humidity to your basement air.
Advice on Managing External Drainage and Gutter Systems
Proper management of water flow around your home is critical in preventing water from reaching your basement:
- Clean Your Gutters Regularly: Keep gutters and downspouts clear of leaves and debris to ensure water flows away from your home’s foundation.
- Install Gutter Extensions: If necessary, use extensions to direct water further away from the foundation.
- Proper Landscaping: Ensure the grading around your home slopes away from the foundation, encouraging water to drain away from, rather than towards, your home.
- Inspect and Repair Exterior Waterproofing Elements: Regularly check any exterior waterproofing systems, such as French drains or exterior membranes, to ensure they are intact and functional.